Sweet Short Crust
♥ Sweet Short Crust
I actually made these tart cases for SHF#9 the other day. These were, in fact, made a few days before I even got around to my pineapple tarts. Oh yes, I did have the pictures all edited and ready to use but I just didn't manage to find the time to go about writing about these tarts before the SHF due date.
Be it tarts or pies, both are something that I have never ever attempted before. In fact, I never thought about getting my hands dirty into tarts or pies until the theme - Tantalizing Titillating Tempting Tarts for SHF#9 came about. I just thought it was quite a nuisance to make tarts and pies, especially after reading about all the warnings and you-have-to-follow-with-my-exact-description-or-you-will-fail instructions re making pies and tarts. They scared me...a lot!
Anyhow, I finally got myself into making some shortcrust and I am actually very surprised. It wasn't as hard as it had seemed! Making the shortcrust dough is basically the same as how you would go about making cookies. It's only until the roll-out-then-lay-over-and-press-and-cut-onto-tart-tin part that got me very confused . I would press the dough too hard onto the tin where the dough actually flattened too much under my finger's pressure and as a result, the crust was too thin in some parts and thick in others. I guess I will just have to do a lot of practice before getting the correct and perfect thickness.
♥ tabeshimashita @ pinkcocoa's kitchen in mid June
♥ Tart Cases
I have used a shortcrust recipe from a Japanese (translated into Chinese) Baking Book - My First Sweet Baking Book by Yasuyo Shida. The book has step-by-step instructions which I have found very useful for beginner who doesn't have someone to guide you ie. people like me! I have adapted Shida's shortcrust recipe and added fillings of my own.
♥ Basic Shortcrust Pastry
enough for 21cm tart tin with removable bottom*
100g unsalted butter, softened
50g icing sugar
1/2 egg, beaten**
1/2tsp vanilla extract
200g cake flour***
- Bring butter and egg to room temperature. Preheat oven to 170c. Brush tart tin with melted butter. Sift flour twice.
- In a large mixing bowl, using a spatula, beat butter until creamy.
- Add in sugar and beat until light and fluffy.
- Add one third of the beaten egg and mix until just combine. Repeat twice with remaining egg.
- Add vanilla extract and mix until just combine.
- Add sifted flour all at once onto the butter mixture and using a cutting motion, "cut" in and scrap from the bottom up the flour with the butter mixture until just combine or when a dough is formed
- Knead dough lightly for 5 second. Flatten slightly and cover with cling wrap before going into the fridge for 30minutes.
- Take dough out from fridge, unwrap and place dough onto the piece of cling wrap you just unwrapped. Take another piece of cling wrap, slightly bigger than the dough and place it over the dough. Using a rolling pin, roll dough out to 2-3mm thick and slightly larger than your tart tin.
- Take away the cling wrap on top of the dough. Grabbing from both side the cling wrap on the bottom, flip the dough and lay it over the tart tin.
- Without taking away the cling wrap, using your index finger, lightly press dough into tin, making sure there is no air gap between the tin and the dough, especially at the corner and side.
- Take rolling pin and roll over on the top of the tin to remove excess dough. Take away cling wrap and lightly peel away the excess dough. Prick bottom of tart with fork to ensure there is no air pocket.
- Cover with cling wrap and let rest in fridge for at least 30 minutes
- Place a sheet of greaseproof paper over the tart and lay some baking beans or rice or any sort of beans on top. This is called blind baking. Bake in oven for 15 minutes.
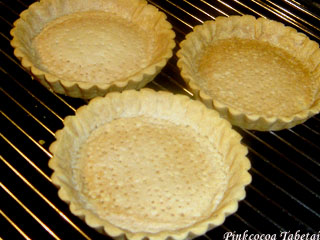
- Take away paper and beans, and bake for a further 12-15 minutes or until golden brown if you want a blank tart case, or add in fillings at this step and bake for 12-15minutes. Alternatively, you might not need to do blind baking but fill your tarts and bake straight in the oven for 30-40 minutes.
- Let cool for 5 minutes before turning out onto rack to cool completely
notes:
*I used 4 x 12cm-diameter tart tins
**If you find it troublesome to use just half an egg, use an egg yolk like I did!
***Plain flour is fine if you don't have cake flour. Alternatively, you can make your own cake flour by replacing 20% of plain flour with rice flour or corn flour.
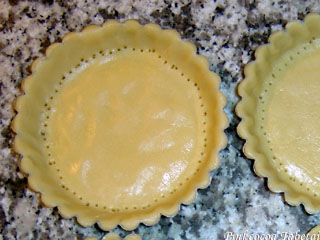
♥ Pricking Corners
Make sure you prick the corner to ensure there is no air pocket. This is the first place I prick, using a fork, before proceeding to the rest of the pastry.
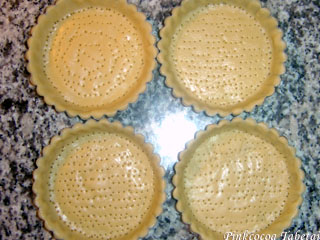
♥ Pricking All Over the Bottom
After I pricked the corner, I randomly pricked the rest of the pastry. I was tempted to prick a nice symbol but alas, I am just so bad when it comes to art so I ended up pricking the pastry in random order.
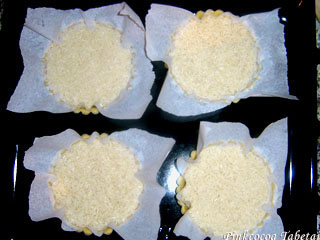
♥ Blind Baking
I used rice as my baking weights since I don't have the proper baking weights. You can also use soy beans, red beans, green (mung) beans and even lentils. After baking, the rice has a very sweet and buttery fragrant that stick to it. You can still cook the rice which I did and the rice tasted a little sweeter than usual!
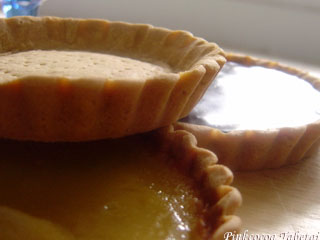
These shortcrust pastry was rather well received. It was quite smooth and buttery. The tart cases were also very delicate. I actually broke one when I was transporting it for a photoshoot. I should have been more careful! Anyhow, I quite love this shortcrust pastry and I think I will making more of this in the future. Yessss! I can finally say yes to a apple tart order now :-)


♥ pinkcocoa tabete @ Tuesday, June 28, 2005

|
<< Home